DIY Digital Audio Amplifier Circuit using PAM8403 Amplifier Module
The PAM 8403 audio amplifier module is a class D audio power amplifier. It has a dual-channel stereo output that can drive two 3W speakers. This is one of the cheapest and most powerful stereo amplifiers, provided with proper wiring and power sources. The Amplifier can be used in small to medium-scale projects and even for DIY small home theater.
PAM8403 Amplifier Module Specifications
- Operating voltage Range: 2.5v to 5v
- Efficiency: 90%
- Output Power: 2*3watt speaker (at 4 ohm)
- Filterless, Low Quiescent Current and Low EMI
- Short Circuit Protection and Superior Low Noise
PAM8403 Digital Audio Amplifier Module Pinout
The module comes with simple interfacing terminals making all connections easy. The module uses only PAM8403 IC, capacitors, and some Resistors used in circuitry.
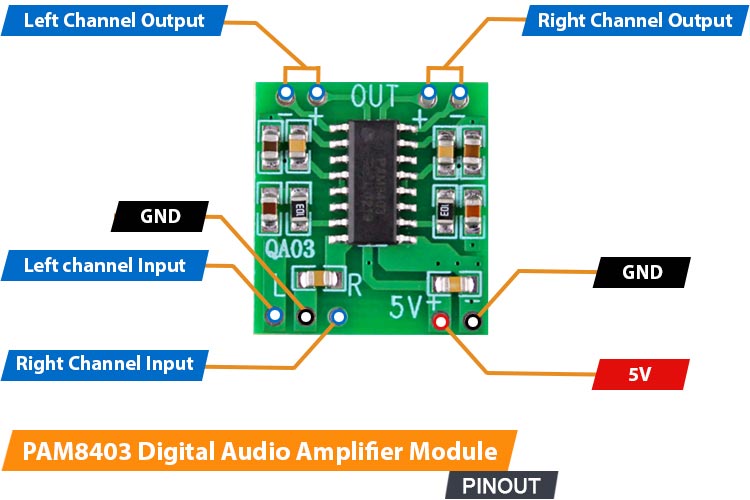
Power Terminals
- VCC and GND terminals are used to supply power to the module. VCC is capable of 2.5v to 5v input.
Input Audio Terminals
- Since the module is a Stereo Amplifier, it also has Dual channel Input which is Left and right with a common Audio ground.
Output Audio Terminals
- OUT R: It is the Right channel output terminal capable of delivering max. 3w at 4ohm or 8ohm.
- OUT L: It is the Left channel output terminal with the same output power as the Right Channel.
DIY Audio Amplifier Circuit Diagram
According to the power output specification delivered by the module, we are connecting two 3w, 4ohm speakers at the output side. The power supply is given by the 5v Adaptor.
Components Required:
- PAM8403 Audio Amplifier Module
- Audio Plug/Jack - 3.5mm
- 5v Power Adaptor source
- 2*3watt speakers (4 ohm)
The input we are providing using an Aux Cable from a Smartphone audio Jack. The input cable must be stereo-compatible with a TRS (Tip Ring Sleeve) jack. The TRS denotes the three conductors: Tip (T), Ring (R), and Sleeve (S), which segment the audio plug into three sections. The Tip acts as the left channel to transmit one signal while the Ring acts as the right channel to transmit the other signal. The Sleeve is connected to the ground.
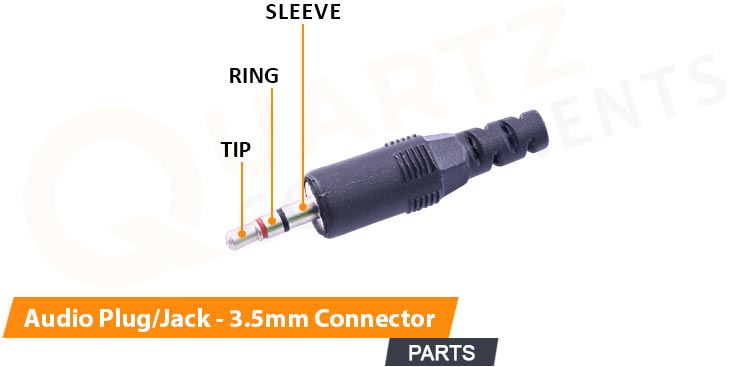
Either use the Above type of TRS jack and solder the connections or use any scrap Earphone/Aux cable by cutting it in between to make it open end from one side like the image below.
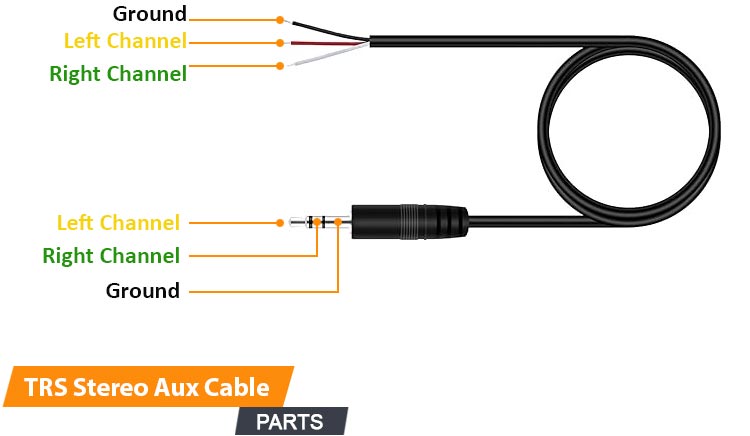
Note: Confirm the bare wires by checking continuity through the multimeter. So that you can surely separate the three wires according to TRS Jack which reduces the risk of wrong wiring.
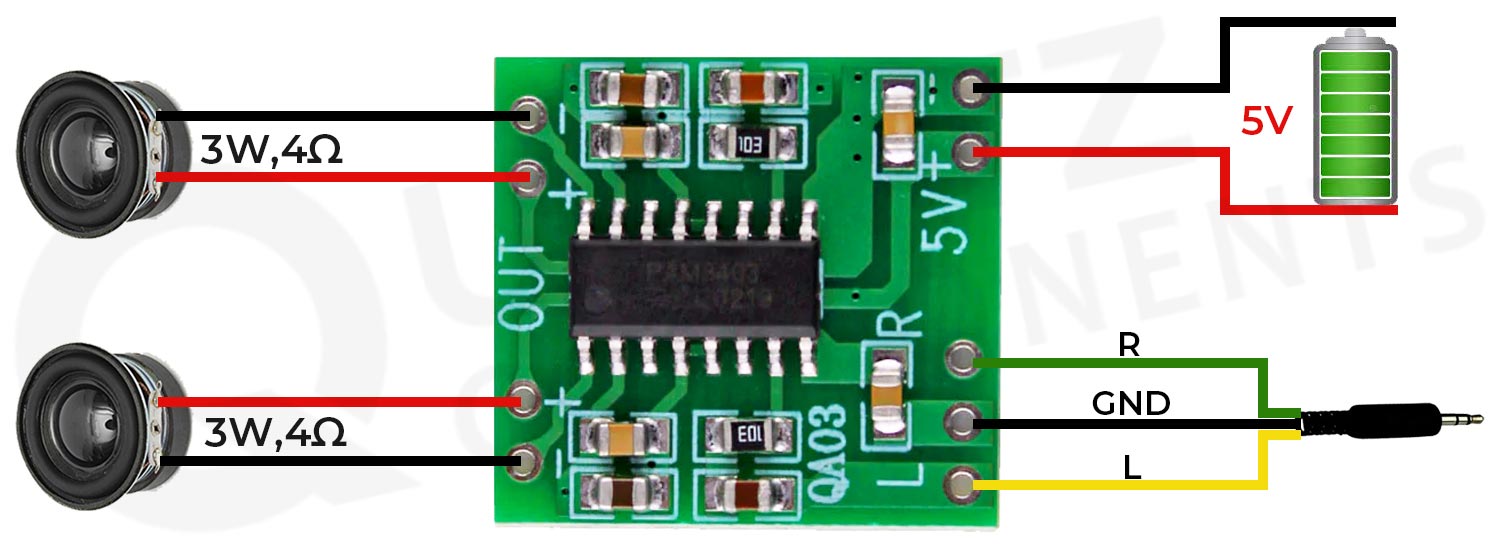
Now the connections are pretty simple:
- Connect power terminals to a 5v adaptor where +Ve to 5v and GND to ground.
- Connect the TRS Input jack (L, R & GND) to the Audio input of the Module.
- Connect Both Speakers at both L & R output terminals.
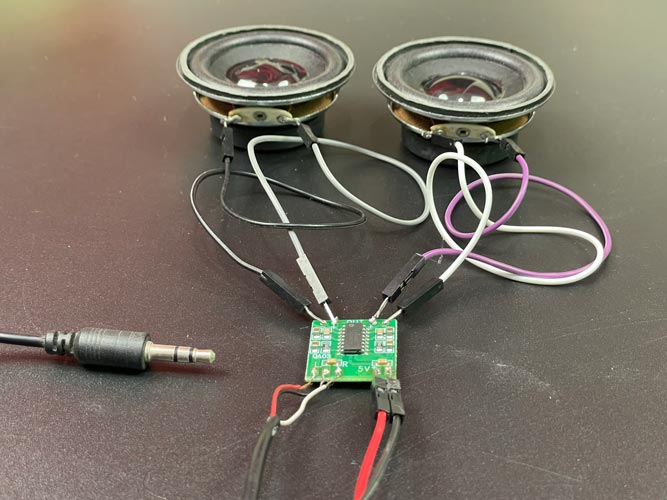
Demonstration of PAM8403 Audio Amplifier Module
Check all the Connections, none of the wiring should be short-circuited. Power on the Adaptor or supply source power.
Connect the Audio Jack to an Input Audio Source like a Smartphone or MP3 player. Start playing any song and don’t forget to increase the volume of your Audio Source.
That’s all, now you hear the majestic sound coming from the Audio Amplifier. Play your favorite song and enjoy it.

Hope you liked and enjoyed the project and learned something valuable from it. If you have any questions, you can leave them in the comment section below.