


AI Based Text-to-Speech System with MAX98357A & ESP32

Components Required
About the Components
ESP32 Development Board
The ESP32 Development Board is a powerful and feature-rich microcontroller module with integrated Wi-Fi and Bluetooth capabilities. Based on the ESP-WROOM-32 SoC, it supports dual-core processing and is widely used in IoT, automation, robotics, and wireless sensor applications. The 30-pin layout provides multiple GPIOs and interface support for advanced embedded systems.

- Dual-core 32-bit LX6 microprocessor
- Integrated 2.4GHz Wi-Fi and Bluetooth
- 30-pin compact development board
- 520KB SRAM and 4MB Flash memory
- Supports ADC, DAC, PWM, I2C, SPI, and UART
- PCB antenna for wireless communication
- Built-in USB to Serial interface
- Low power consumption modes
- Breadboard compatible design
- Clock speed up to 240MHz
In this project, the ESP32 connects to the Wit.ai cloud platform through WiFi, processes Serial Monitor text input, and streams generated speech audio to the MAX98357A amplifier using the I2S interface.
MAX98357A I2S Audio Amplifier
The MAX98357A I2S 3W Class-D Audio Amplifier Module accepts digital audio through the I2S interface and converts it into amplified analog audio output suitable for direct speaker connection. It combines a digital-to-analog converter and amplifier on a single compact board.
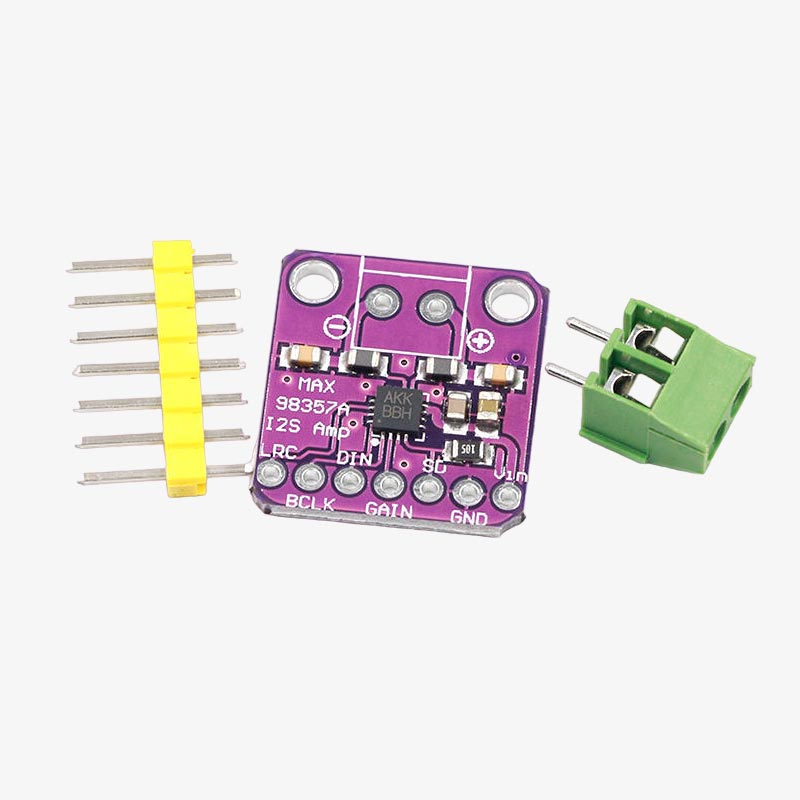
- I2S digital audio input support
- Built-in DAC and Class-D amplifier
- 3.2W output power with 4Ω speaker
- Operating voltage from 2.7V to 5.5V
- Supports both 3.3V and 5V signal levels
- Selectable gain levels
- Default stereo signal mixing (L + R)
- Compact module design
- Low noise audio performance
In this project, the MAX98357A receives digital I2S audio data from the ESP32 and amplifies it to drive the speaker for real-time voice playback.
4Ω 2.5W Speaker
The 4Ω 2.5W speaker is a compact audio output device commonly used in televisions, embedded systems, and DIY audio projects. It provides clear sound output and supports amplified audio playback.
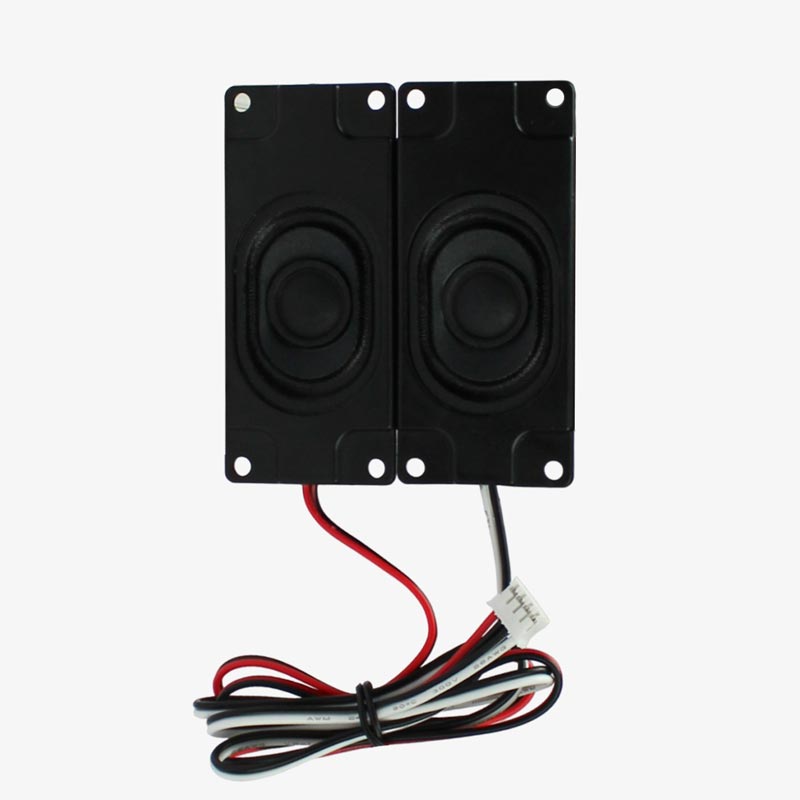
- 4Ω speaker impedance
- 2.5W power handling capacity
- Compact rectangular design
- Clear and loud audio output
- Suitable for embedded audio systems
In this project, the speaker outputs AI generated speech amplified by the MAX98357A audio amplifier module.
Installing the WitAITTS Library
The WitAITTS library is required for WiFi communication, cloud-based speech synthesis, and I2S audio streaming on the ESP32. Install the library before uploading the project code.
- Open Arduino IDE
- Go to Sketch → Include Library → Manage Libraries
- Search for WitAITTS
- Install the latest version of the library

Fig. Installing WitAITTS Library in Arduino IDE
Generating the Wit.ai API Token
The ESP32 requires a Wit.ai API token to access the cloud-based text-to-speech service. The token can be generated from the Wit.ai developer dashboard.
- Open the Wit.ai website and create an account
- Create a new Wit.ai application
- Open the application settings page
- Copy the Server Access Token
- Paste the token into the Arduino code

Fig. Generating Wit.ai API Token
Circuit Connection

Fig. Breadboard Diagram

Fig. Schematic Diagram
MAX98357A Connection
- BCLK → ESP32 GPIO27
- LRC → ESP32 GPIO26
- DIN → ESP32 GPIO25
- VIN → 5V
- GND → GND
Code Explanation
Library Used
Purpose of Library
#include <WitAITTS.h> → Handles WiFi connection, cloud communication with Wit.ai, audio streaming, and text-to-speech generation on ESP32.
WiFi Credentials
Stores the WiFi network name and password required for internet connectivity.
Wit.ai API Token
The API token authenticates the ESP32 with the Wit.ai cloud text-to-speech service.
Voice Configuration
Different voice characters are stored inside an array and can be selected dynamically using Serial Monitor commands.
Voice Selection
Sets the currently active voice character for speech generation.
Audio Configuration
Controls speech speed, voice pitch, and output audio volume.
Voice Change Command
Allows changing the active voice dynamically through Serial Monitor commands like voice 4 or voice 7.
Text-to-Speech Generation
Sends typed text to Wit.ai servers and streams generated speech audio back to the ESP32 speaker.
Working of Loop
- Continuously monitors Serial Monitor input
- Detects voice change commands
- Switches between multiple AI voice characters
- Processes typed text input
- Sends text to Wit.ai cloud platform
- Receives generated speech audio
- Streams audio using I2S interface
- Outputs speech through MAX98357A amplifier and speaker
System Summary
The ESP32 connects to the internet using WiFi and communicates with the Wit.ai cloud platform through the WitAITTS library. Text entered through the Serial Monitor is converted into speech audio using multiple selectable AI voice characters. The generated digital audio stream is sent through the ESP32 I2S interface to the MAX98357A amplifier module, which drives the speaker for real-time voice output.
Why this Architecture Works
- Cloud-based TTS enables natural sounding speech generation
- ESP32 provides built-in WiFi connectivity
- I2S audio ensures clean digital sound output
- MAX98357A simplifies audio amplification
- Dynamic voice switching increases interactivity
- Serial Monitor control simplifies testing and debugging
Real-Life Applications
- AI Voice Assistants: Smart embedded voice response systems
- Talking Robots: Speech-enabled robotics projects
- Home Automation: Voice notification systems
- IoT Devices: Audio feedback for connected devices
- Accessibility Systems: Text-to-speech assistive technology
- Interactive DIY Projects: Multi-voice entertainment systems
Result
The ESP32 successfully connects to the Wit.ai cloud platform and converts typed Serial Monitor text into natural sounding speech in real time. Multiple voice characters including pirate, wizard, cartoon kid, vampire, and British butler voices operate correctly through dynamic voice switching commands. The MAX98357A amplifier provides clean audio output through the connected speaker, creating a compact WiFi based AI voice synthesizer system.
